Setting up n8n for your law firm
I will walk you through how to get your copy of n8n running for your firm. Once you're at the other end of this guide, you'll be glad you followed along!


If you're unfamiliar with n8n, check out this review I posted of the tool. The short version is that n8n is a faircode alternative to Zapier, with much more generous pricing options, a relatively simple interface, and more powerful logic options.
We use n8n in our firm every day, and so far, we have run tens of thousands of automations across hundreds of workflows.
I will walk you through how to get your copy of the service running for your firm. If you're unsure if you want n8n, you can download their desktop version here for testing. I don't recommend the desktop version for most use cases other than tinkering, and once you're at the other end of this guide, you'll be glad you did it!
This guide is not meant to teach you about the technical underpinnings of any of the tools mentioned, it's meant to get you from point A to point B.
Also, note the photos often include steps to follow. While the structure of the guide may jump back and forth between text and pictures, I tried to structure it in a way where you can follow the instructions in a direct line from beginning to end.
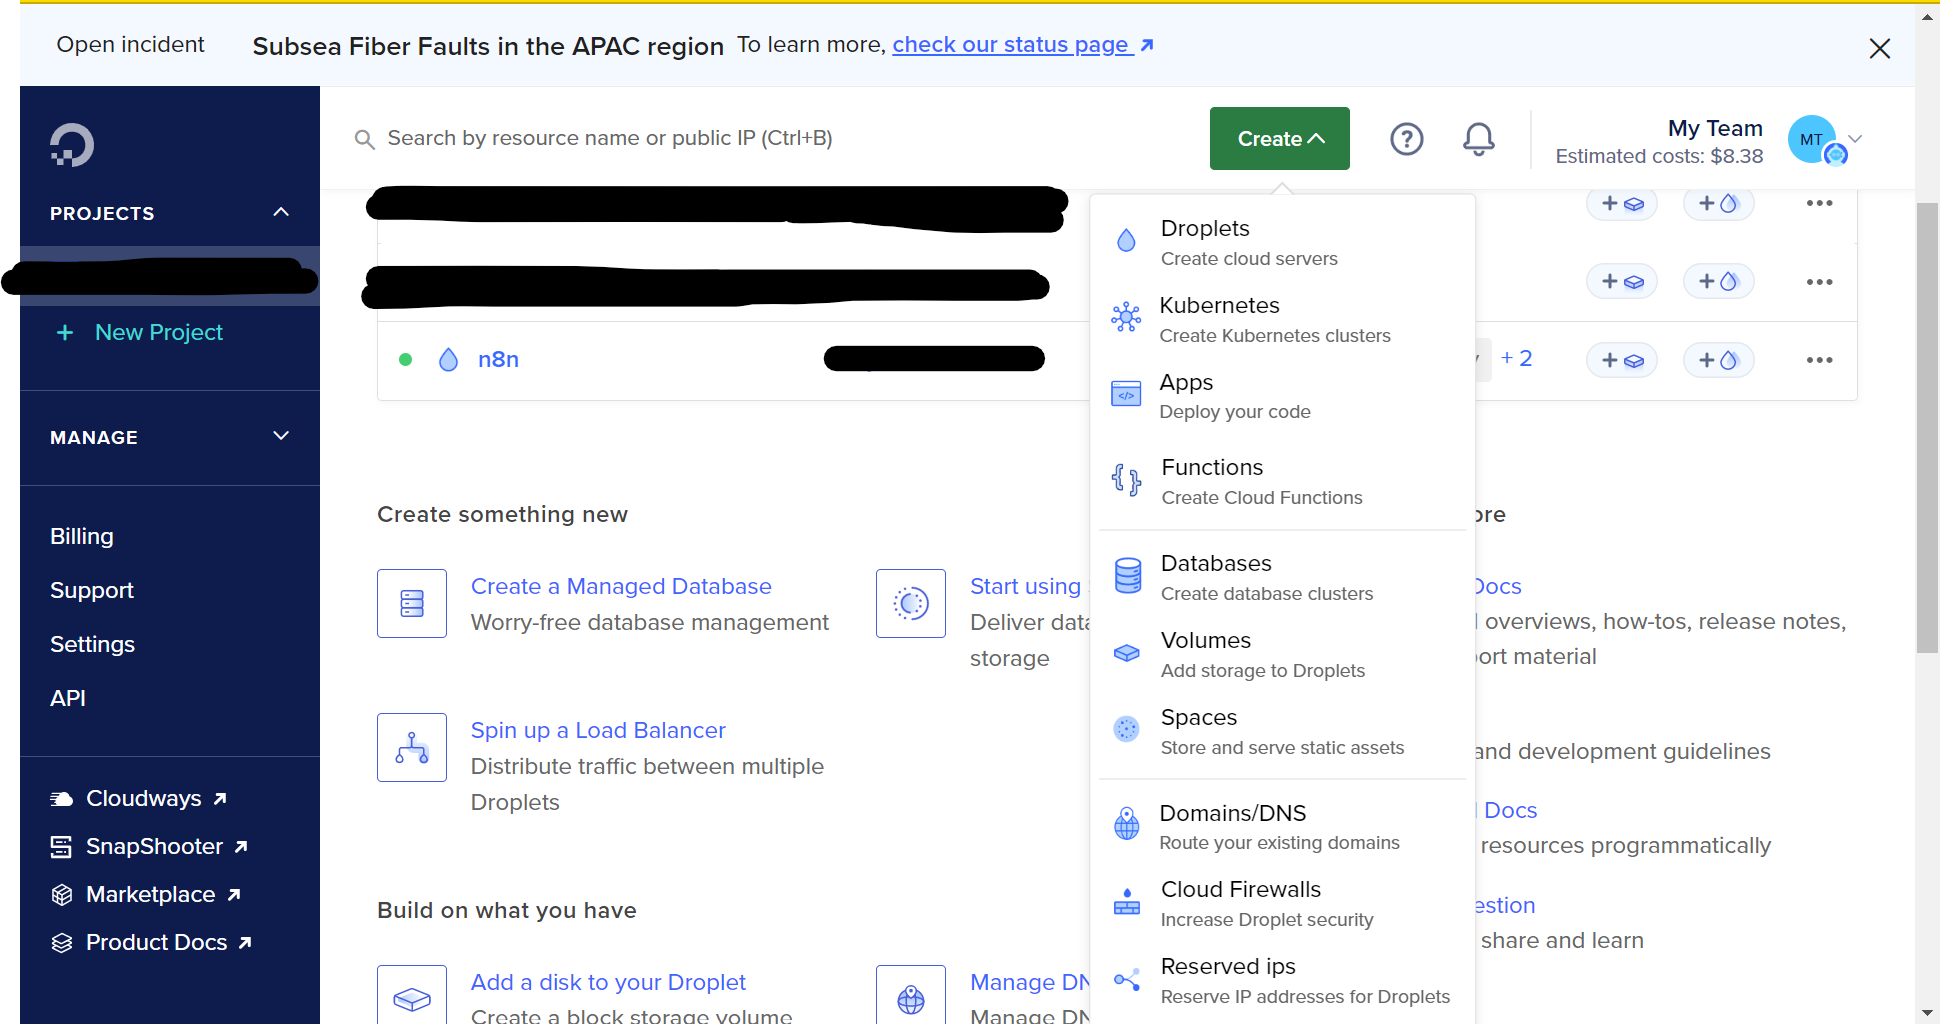
Create an "Instance" or "Droplet" with a Virtual Private Server
Sign up for a virtual server provider. I use Digital Ocean and will provide instructions based on that provider. You can use other providers, but it might cause changes to the setup instructions.
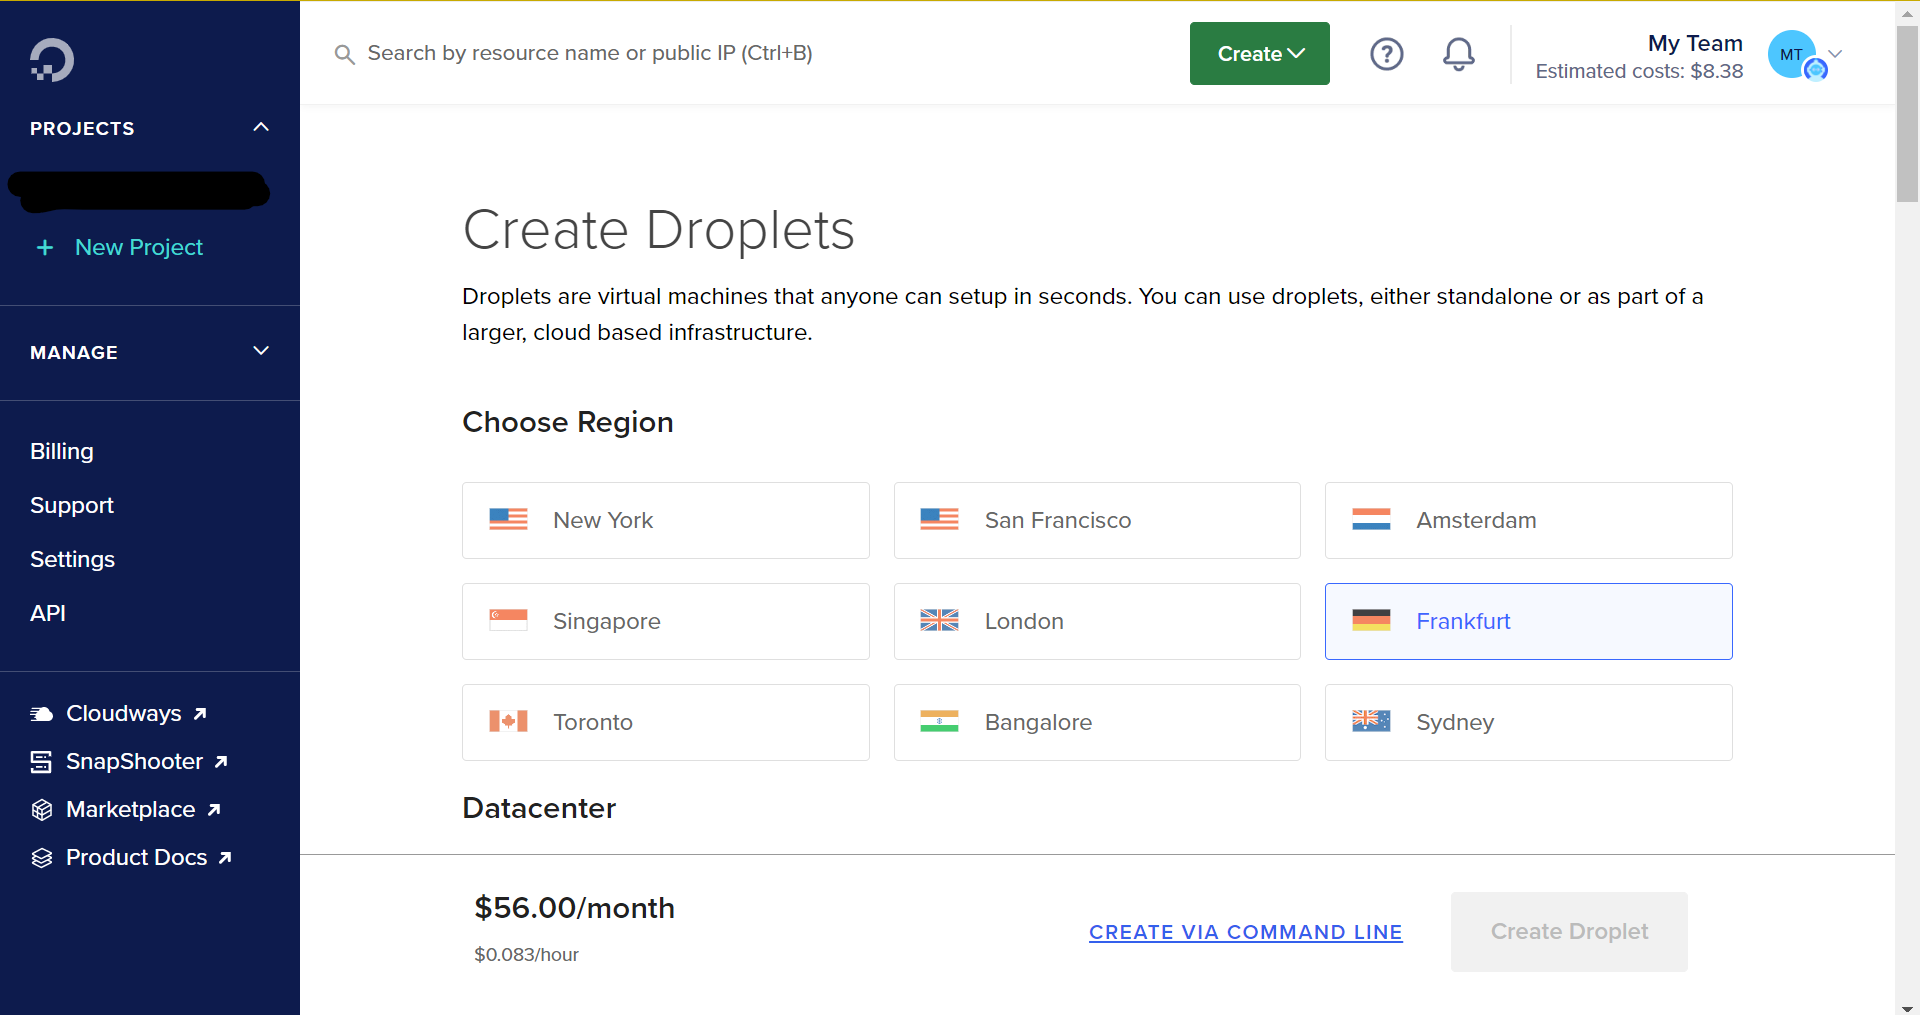
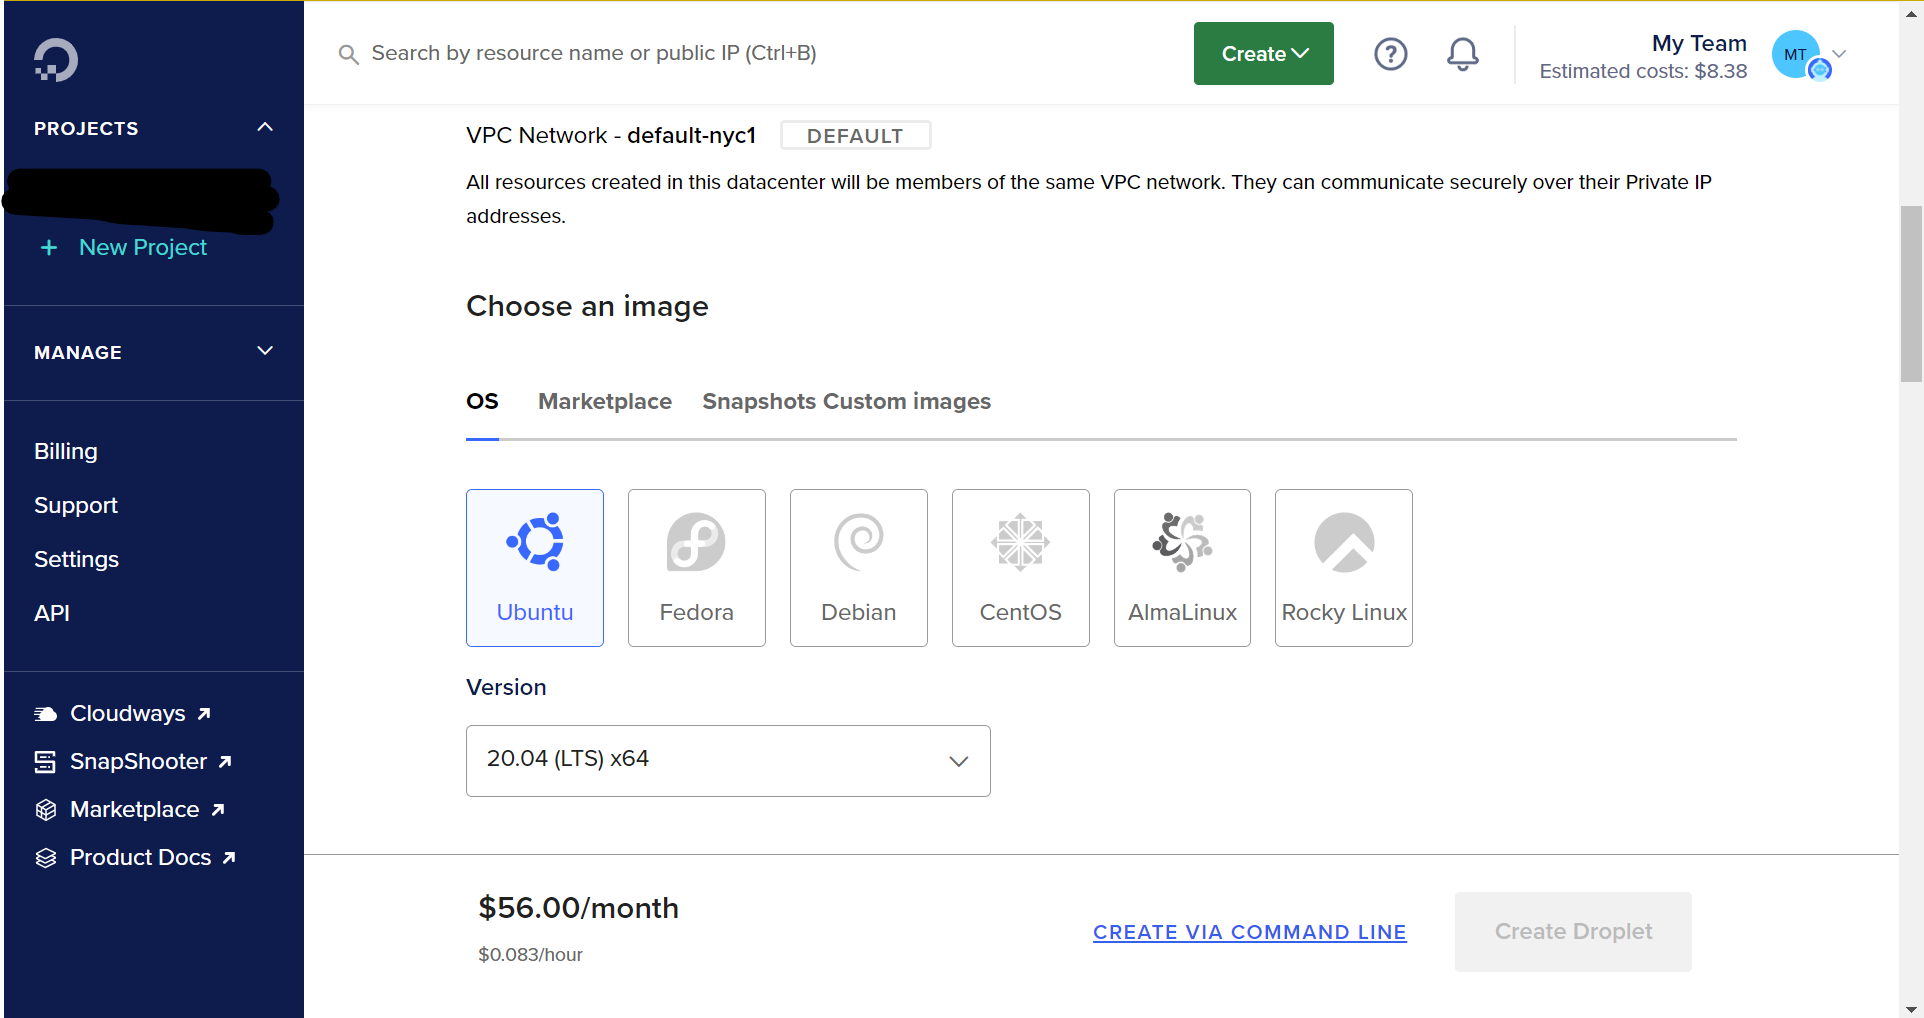
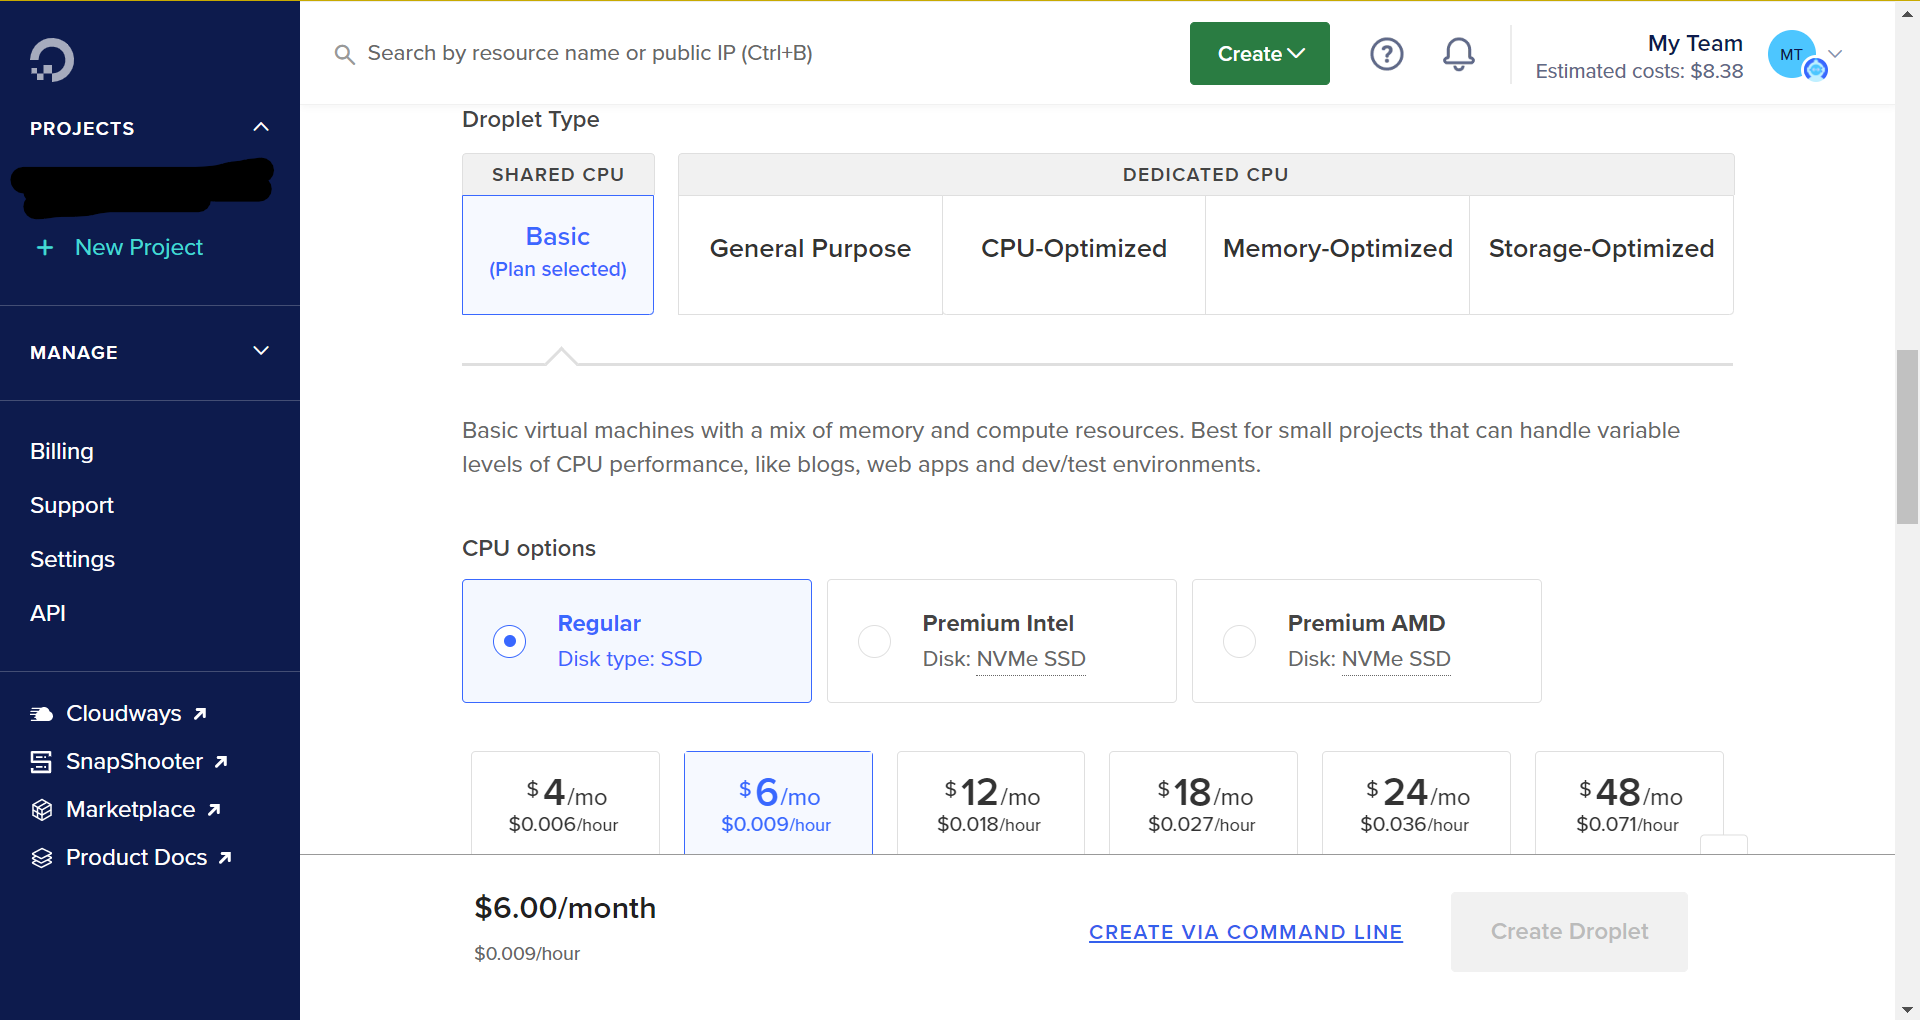
Picking Options for your Droplet
You will need to make some selections about your Droplet, including a location for your server and the specs of your device. I will walk you through a basic installation, but if you are comfortable adjusting, you can opt for different or higher specs.
Setting Up a "Password"
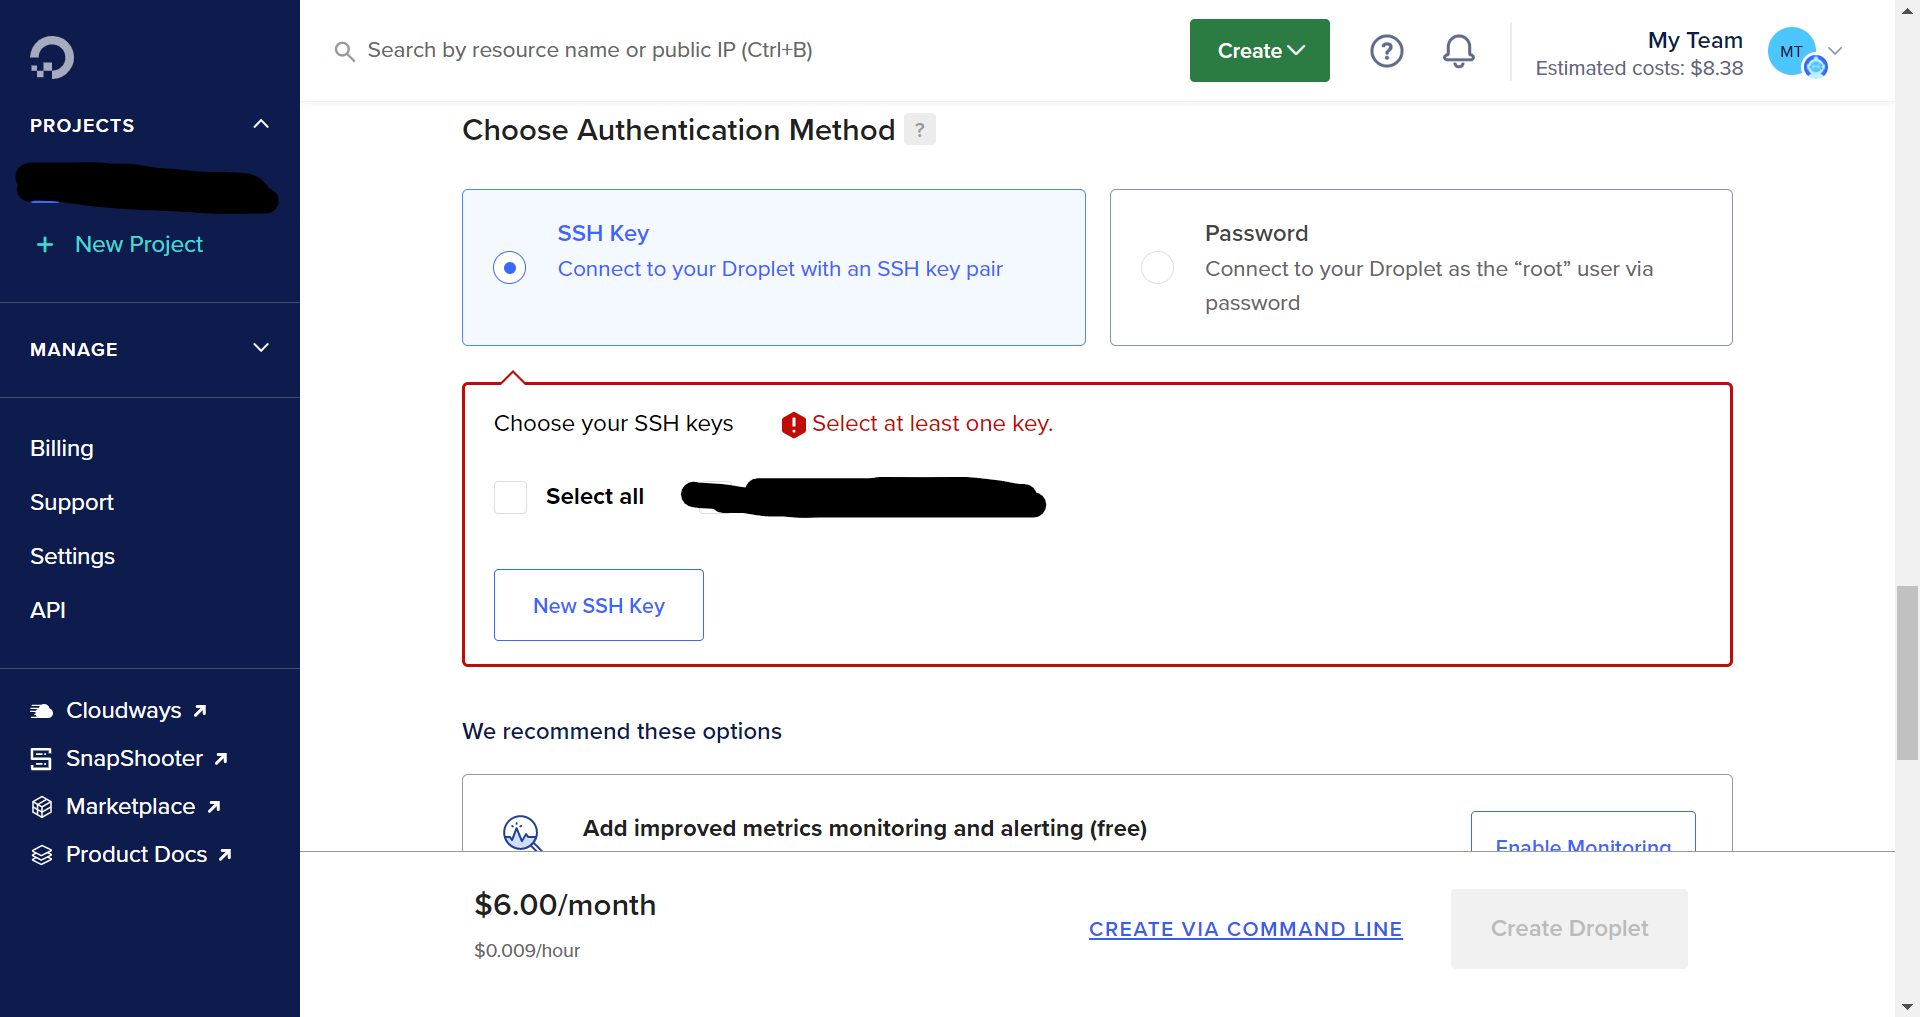
Open a terminal and run the command below. In Windows, your terminal will be "Windows Powershell," in Mac, the terminal is called "Terminal." Running a command is literally typing in the statement and then pressing enter, so don't be intimidated!
ssh-keygen
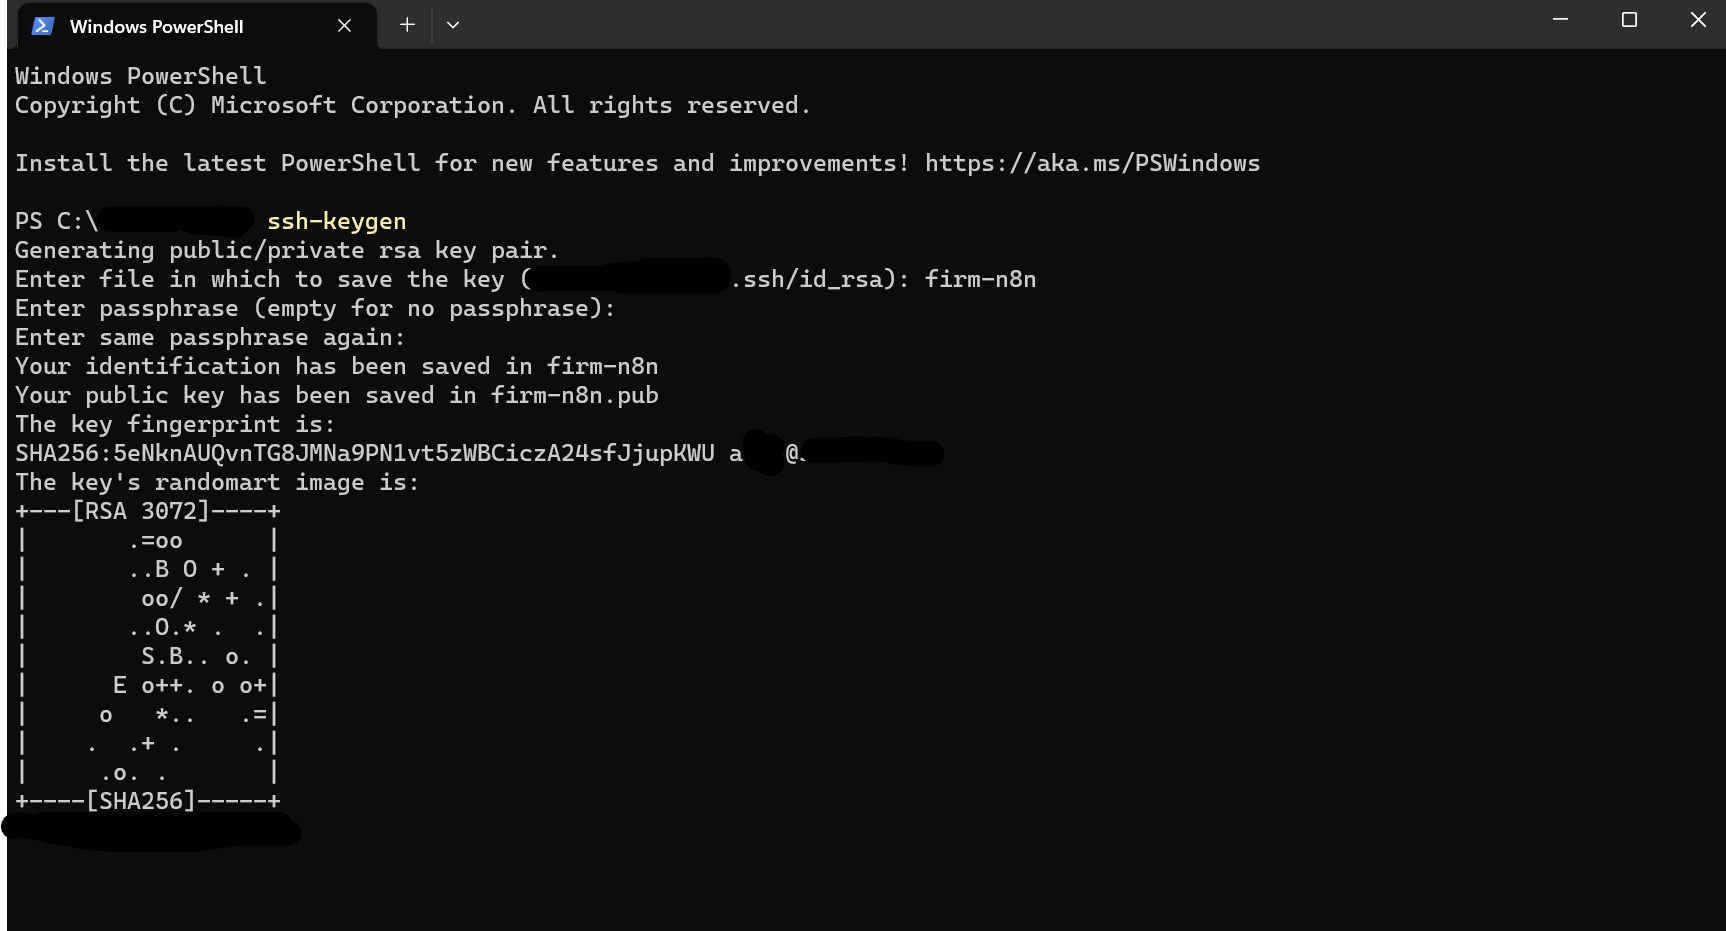
You will be prompted to save and name the key. I selected "firm-n8n," but you can call it whatever you want. When it prompts you for a passphrase, make sure to enter one. Longer and complicated is better, but longer is better than complicated. For example, pick five random dictionary words and string them together with hyphens, then add a number to one of them like this:
"Heroism5-Gala-Mollusk-Childcare-Negative"
Go to the save file location for the "firm-n8n.pub" file and "Copy the Path." On Windows, you can right-click and select "Copy as Path." On Mac, it's "Copy as Pathname."
Go back to your terminal and enter the following command:
cat PASTE_PATHNAME_HERE
In my case, the command would look like this:
cat "C:\Users\alex\firm-n8n.pub"
You'll see a large block of characters that you will need to copy and paste. Here's an example of what the block might look like:
ssh-rsa AAAAB3NzaC1yc2EAAAADAQABAAABgQCbw36hbKzEECQxX127ZuwGq/Imn4eIS3MpTmAWAqkJI7EG1t4SACn/0dxfgRBQXIsKrqF932sL/SHTp/IL3MRrkIBchsUsCG6AWR2MEKydj1OhYF9d90HY5PNDMmzSex9SUbp7YUNB93498WTXV6gfMQ9MvmlgvVBS8DfmKpvHC++pChAdGsRZc3gtOXTXzUMXIZ4aujY5XeIfo7uthwHsqocMRXyQHPztxgsUyAB3AsziT8wUO6AfcUtAKDgrpPNrDdsZbGZBak7pzEr3M5ckDloF7zy62Z070uWynRLENjwvQK3J5KemXe/3Q+LylnXRRNqqhDnVvJokHWeFYDqYSFq1FiM/gf41EMGb6es+MAfsSwLACHsKKjNaJMGR3SDSAqXybP6vGBRcUEG2Sx5x2jXyfLQszpM72C5nh9F0ybL/hdtiRqL0fFPj9CTlXkLUyXIzHfP4YEz1xfxppg05cOzrAAueZos81mK3+oart+UhN1LlVzpTNQ8jYmsquVc= myname@mycomputer

Finally, set the name of your droplet (its Hostname) and click "Create Droplet." Now we wait! It'll take a minute or two for the droplet to be fully deployed.
Installing n8n on your Droplet
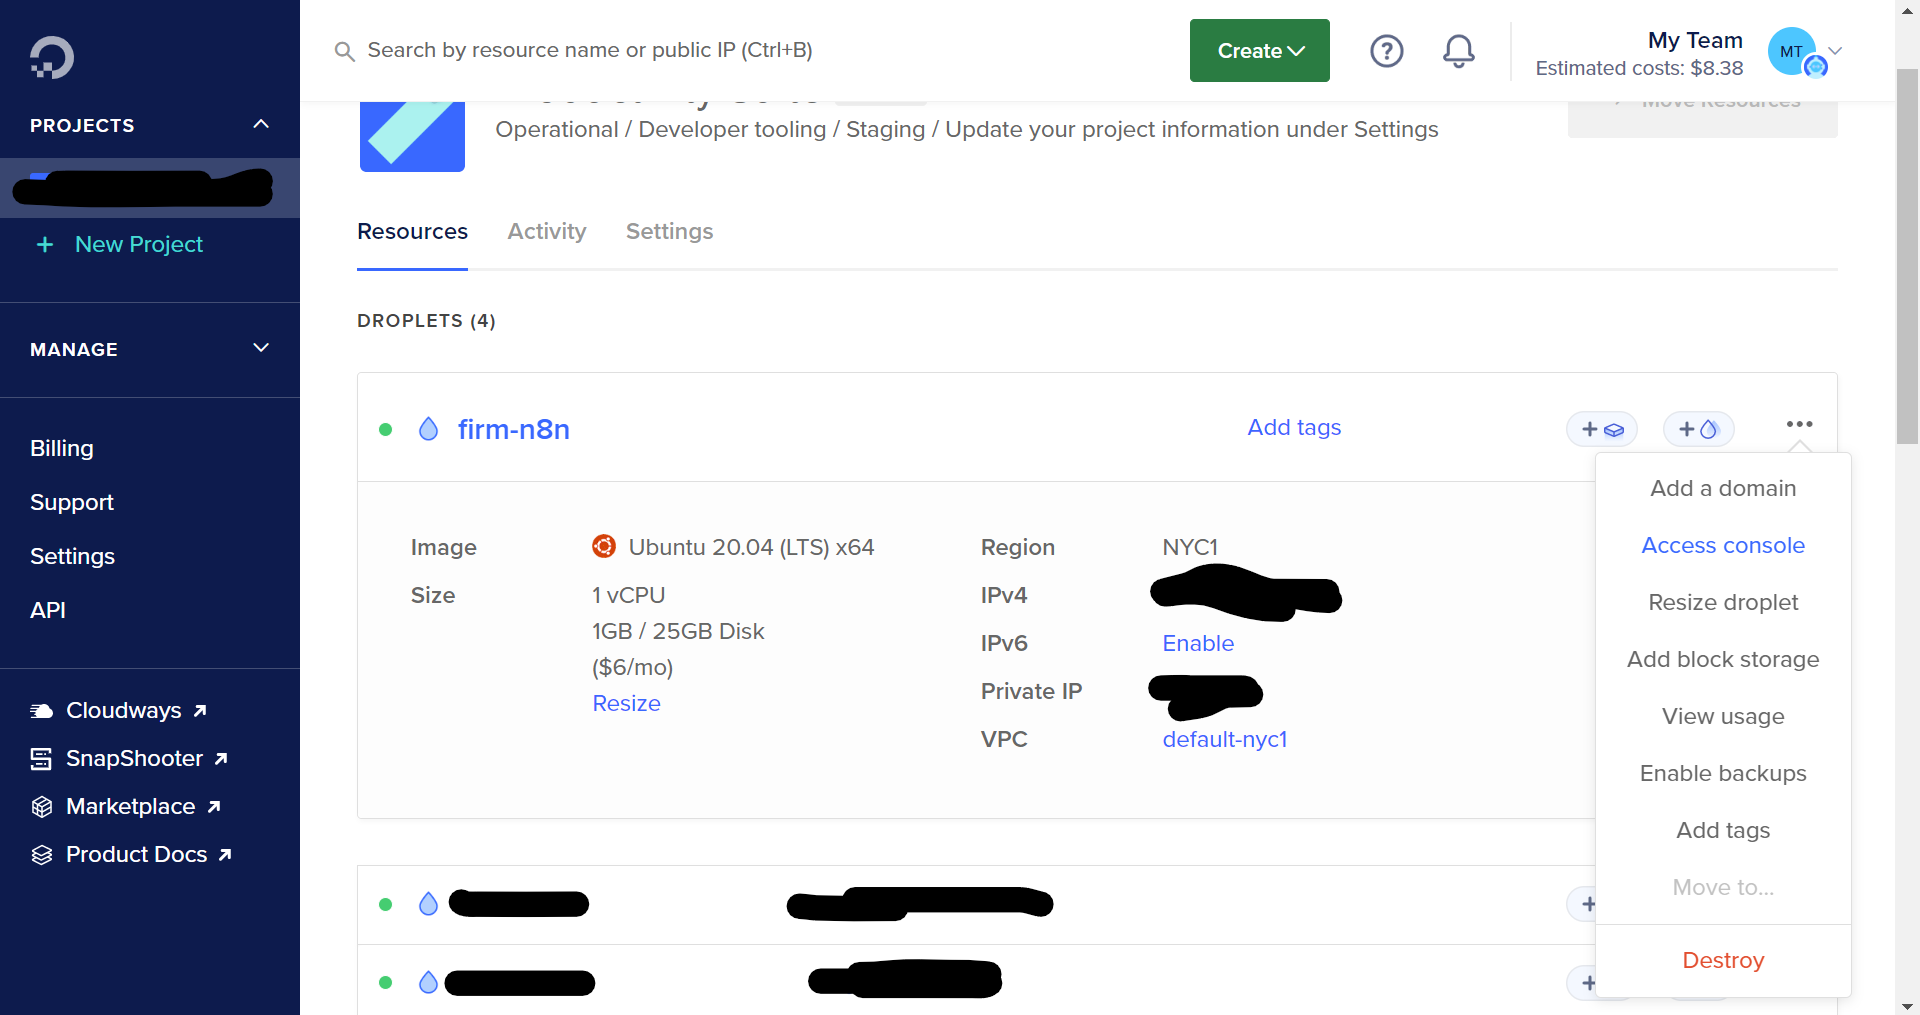
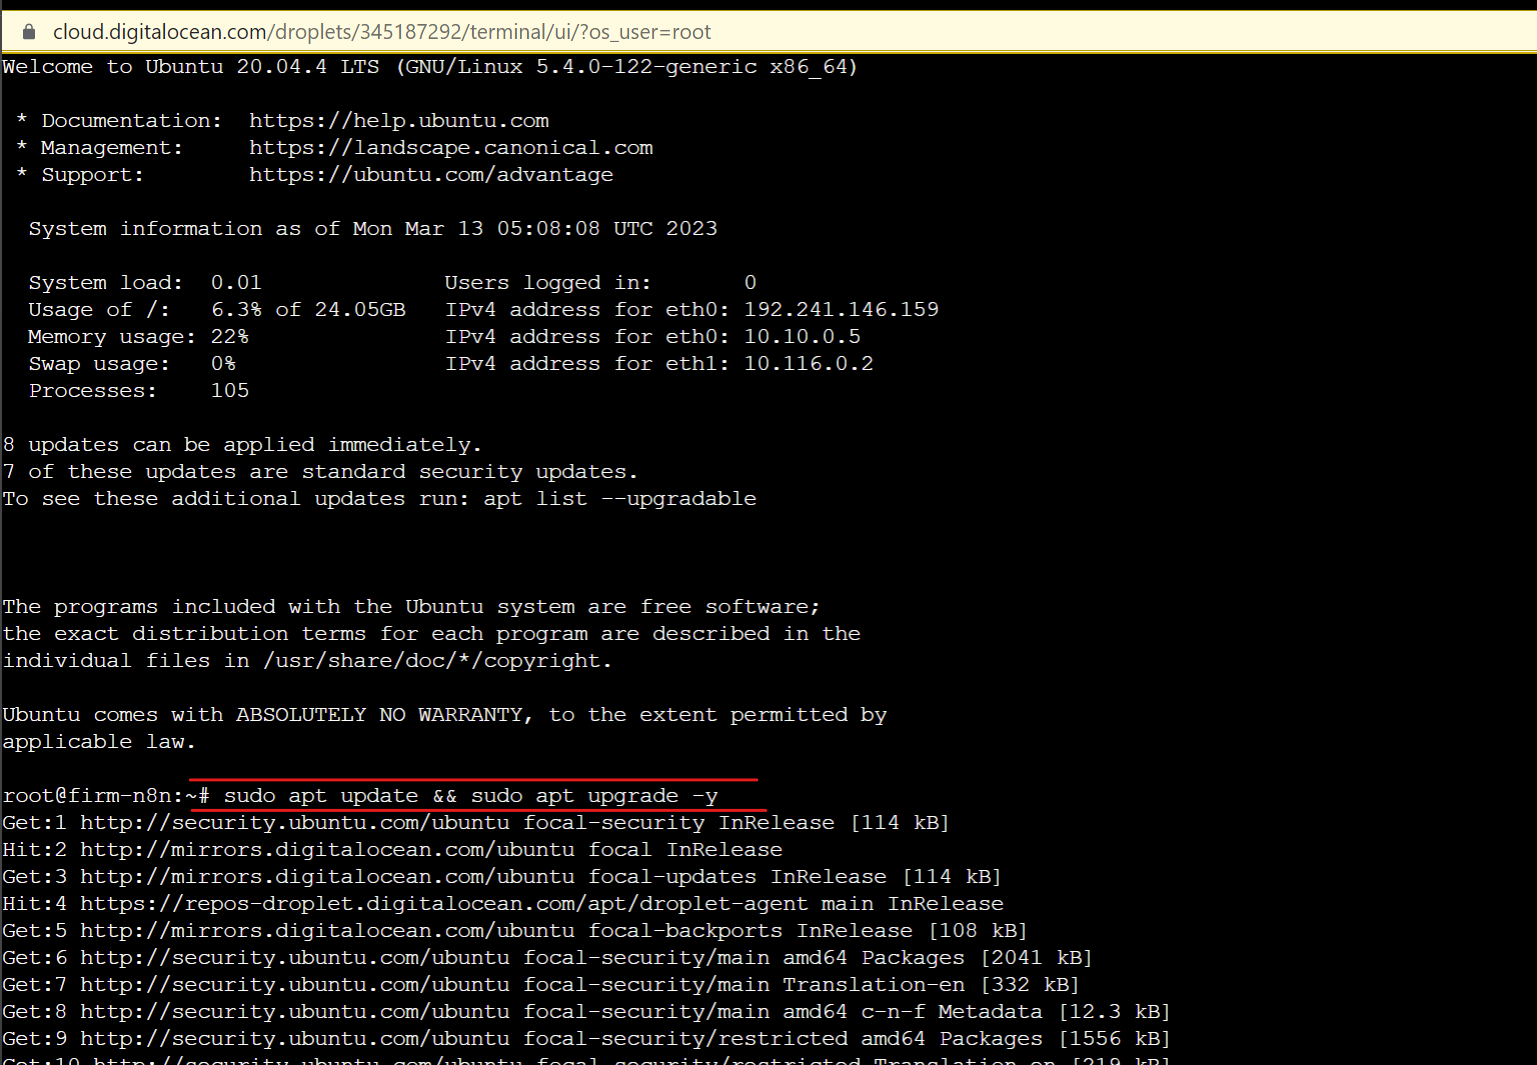
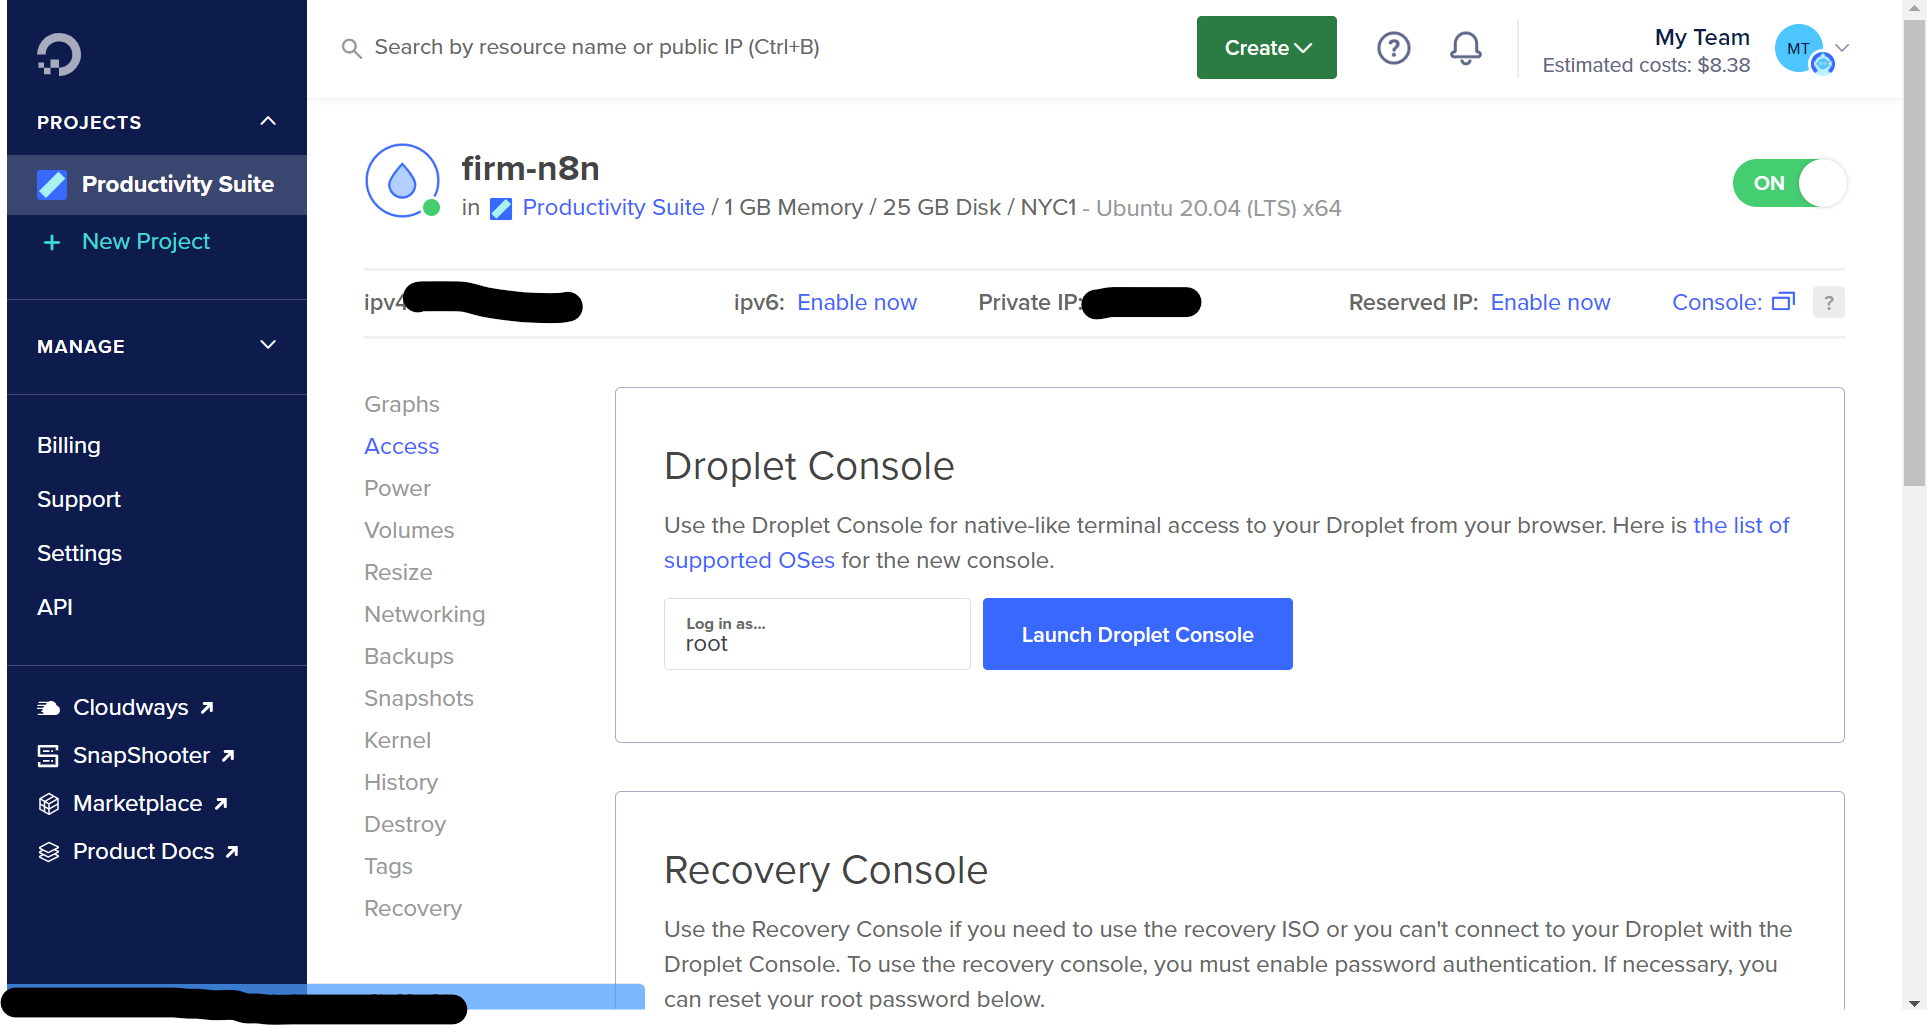
Click on "Launch Droplet Console," and you'll see a terminal open in your browser window.
Prepping your Droplet for Setup
The first thing we will do is prepare your droplet to install n8n. The first command you'll enter is the following:
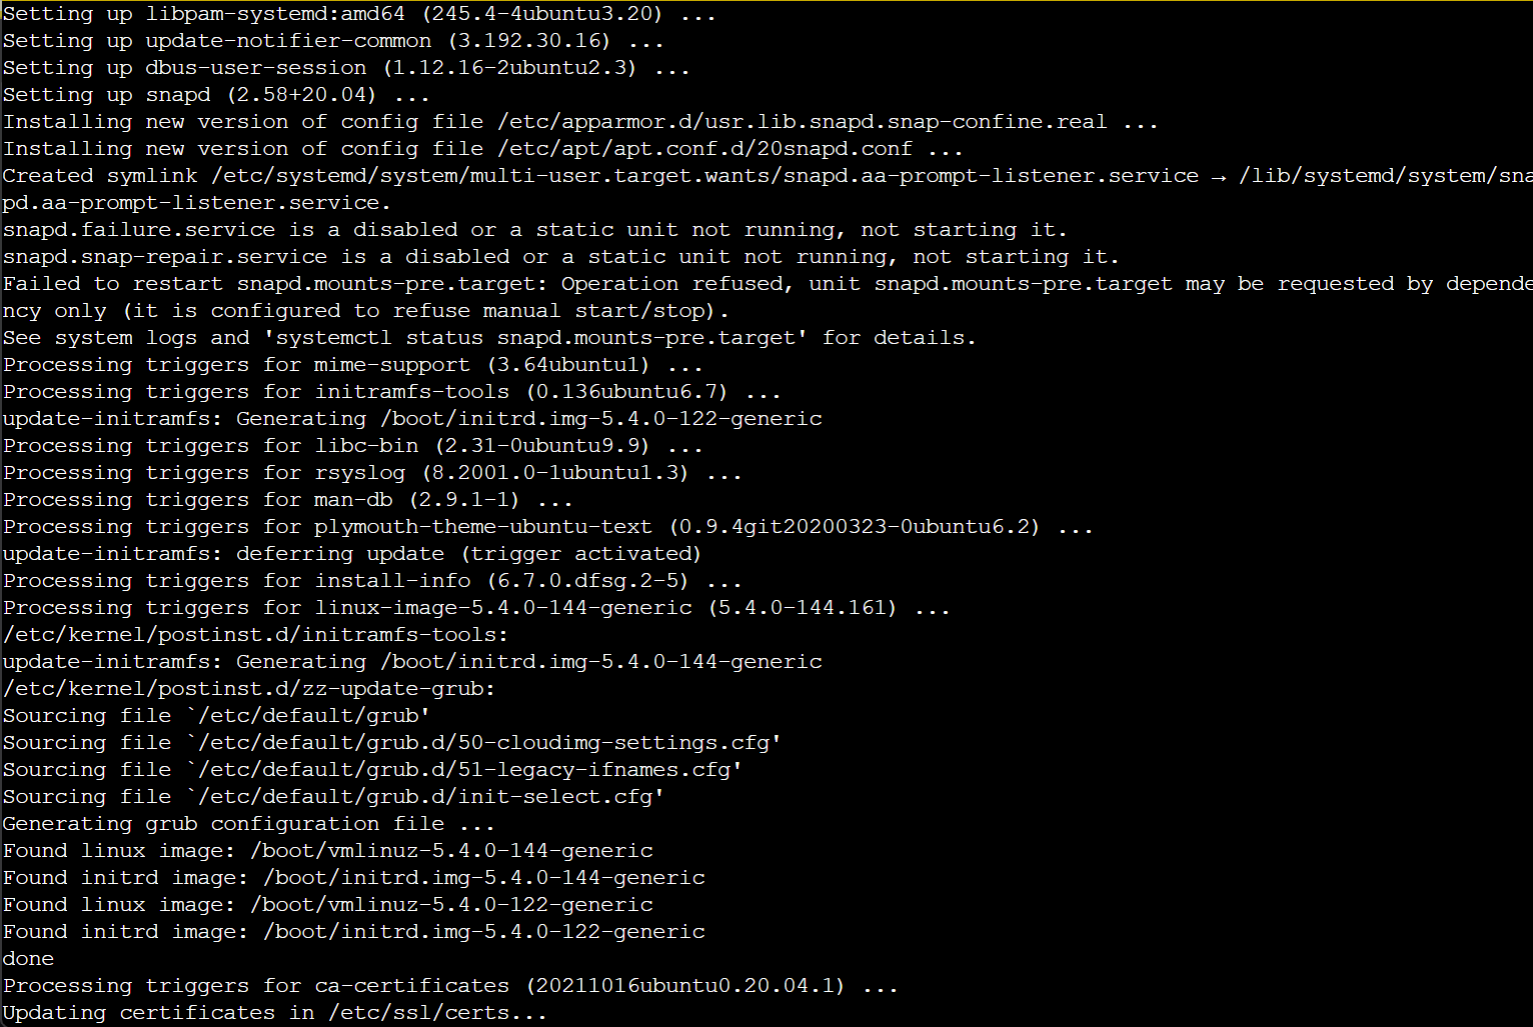
sudo apt update && sudo apt upgrade -y
It'll take another minute or two for the droplet to be ready. In the meantime, you'll see stuff like this:
Getting the Necessary Files to Install n8n
When the droplet has completed updating, copy and paste the following (yes, the whole thing) into the terminal and execute the command:
sudo apt-get remove docker docker-engine docker.io containerd runc
sudo apt-get update
sudo apt-get install ca-certificates curl gnupg lsb-release
sudo mkdir -p /etc/apt/keyrings
curl -fsSL https://download.docker.com/linux/ubuntu/gpg | sudo gpg --dearmor -o /etc/apt/keyrings/docker.gpg
echo "deb [arch=$(dpkg --print-architecture) signed-by=/etc/apt/keyrings/docker.gpg] https://download.docker.com/linux/ubuntu $(lsb_release -cs) stable" | sudo tee /etc/apt/sources.list.d/docker.list > /dev/null

sudo apt-get update
sudo apt-get install docker-ce docker-ce-cli containerd.io
When the terminal asks if you want to continue, type in "y" and press enter.
Copy and paste the following code into the terminal and execute the command:
sudo usermod -aG docker ${USER}
su - ${USER}
Again, copy and paste the following code into the terminal and execute the command:
sudo apt-get install docker-compose-plugin
Installing n8n
For the next step, you'll need your username. Your username is likely "root," but in the terminal, you can enter the following command to get your username:
whoami
Next, you will type in the following:
nano docker-compose.yml
The terminal will open a new blank page. You will copy and paste the following into the blank page (note the space for your username at the bottom of the file):
version: "3"

services:
  traefik:
    image: "traefik"
    restart: always
    command:
      - "--api=true"
      - "--api.insecure=true"
      - "--providers.docker=true"
      - "--providers.docker.exposedbydefault=false"
      - "--entrypoints.web.address=:80"
      - "--entrypoints.web.http.redirections.entryPoint.to=websecure"
      - "--entrypoints.web.http.redirections.entrypoint.scheme=https"
      - "--entrypoints.websecure.address=:443"
      - "--certificatesresolvers.mytlschallenge.acme.tlschallenge=true"
      - "--certificatesresolvers.mytlschallenge.acme.email=${SSL_EMAIL}"
      - "--certificatesresolvers.mytlschallenge.acme.storage=/letsencrypt/acme.json"
    ports:
      - "80:80"
      - "443:443"
    volumes:
      - ${DATA_FOLDER}/letsencrypt:/letsencrypt
      - /var/run/docker.sock:/var/run/docker.sock:ro

  n8n:
    image: n8nio/n8n
    restart: always
    ports:
      - "127.0.0.1:5678:5678"
    labels:
      - traefik.enable=true
      - traefik.http.routers.n8n.rule=Host(`${SUBDOMAIN}.${DOMAIN_NAME}`)
      - traefik.http.routers.n8n.tls=true
      - traefik.http.routers.n8n.entrypoints=web,websecure
      - traefik.http.routers.n8n.tls.certresolver=mytlschallenge
      - traefik.http.middlewares.n8n.headers.SSLRedirect=true
      - traefik.http.middlewares.n8n.headers.STSSeconds=315360000
      - traefik.http.middlewares.n8n.headers.browserXSSFilter=true
      - traefik.http.middlewares.n8n.headers.contentTypeNosniff=true
      - traefik.http.middlewares.n8n.headers.forceSTSHeader=true
      - traefik.http.middlewares.n8n.headers.SSLHost=${DOMAIN_NAME}
      - traefik.http.middlewares.n8n.headers.STSIncludeSubdomains=true
      - traefik.http.middlewares.n8n.headers.STSPreload=true
      - traefik.http.routers.n8n.middlewares=n8n@docker
    environment:
      - N8N_BASIC_AUTH_ACTIVE=true
      - N8N_BASIC_AUTH_USER
      - N8N_BASIC_AUTH_PASSWORD
      - N8N_HOST=${SUBDOMAIN}.${DOMAIN_NAME}
      - N8N_PORT=5678
      - N8N_PROTOCOL=https
      - NODE_ENV=production
      - WEBHOOK_URL=https://${SUBDOMAIN}.${DOMAIN_NAME}/
      - GENERIC_TIMEZONE=${GENERIC_TIMEZONE}
    volumes:
      - ${DATA_FOLDER}/.n8n:/home/node/.n8n
      - /home/<YOUR USERNAME>/n8n-local-files:/files
Once the file is in place, press "Ctrl-X," then press "Y," then press "Enter" to save the file and go back to the main terminal.
You'll need another file to keep your various settings. Enter the command:
nano .env
You'll find another blank page where you can enter the following text:
# Folder where data should be saved
DATA_FOLDER=/root/n8n/

# The top level domain to serve from
DOMAIN_NAME=example.com

# The subdomain to serve from
SUBDOMAIN=n8n

# DOMAIN_NAME and SUBDOMAIN combined decide where n8n will be reachable from
# above example would result in: https://n8n.example.com

# The user name to use for authentication - IMPORTANT ALWAYS CHANGE!
N8N_BASIC_AUTH_USER=user

# The password to use for authentication - IMPORTANT ALWAYS CHANGE!
N8N_BASIC_AUTH_PASSWORD=password

# Optional timezone to set which gets used by Cron-Node by default
# If not set New York time will be used
GENERIC_TIMEZONE=America/Chicago

# The email address to use for the SSL certificate creation
[email protected]
You'll change ALL of the information in this file as necessary, except for the DATA_FOLDER. If you will connect your n8n to a website, replace the domain name with your domain name, and the subdomain can be anything you like, so long as it isn't already used. Use this guide if you need instructions on setting up a subdomain and pointing it to a particular web address.
Then, you'll once again hit "Ctrl-X," "Y," and "Enter." Enter the following command:
mkdir /root/n8n/
If you aren't connecting the server via a typical URL, you will need to go back to the docker-compose.yml file and change the ports field from this:
n8n:
    image: n8nio/n8n
    restart: always
    ports:
      - "127.0.0.1:5678:5678"
to this:
n8n:
    image: n8nio/n8n
    restart: always
    ports:
      - "YOUR_RESERVED_IP_HERE:5678:5678"
Setting Up your Dedicated, Reserved IP
Finally, enter the command:
sudo docker compose up -d
In your browser, either go to the domain you set up in the .env file, or navigate to the reserved IP Address as if it was a typical URL but add https:// to the beginning, and add :5678 to the end like this:
https://192.168.1.101:5678
When you navigate to your website, it will ask for your username and password (as set in your .env) file.
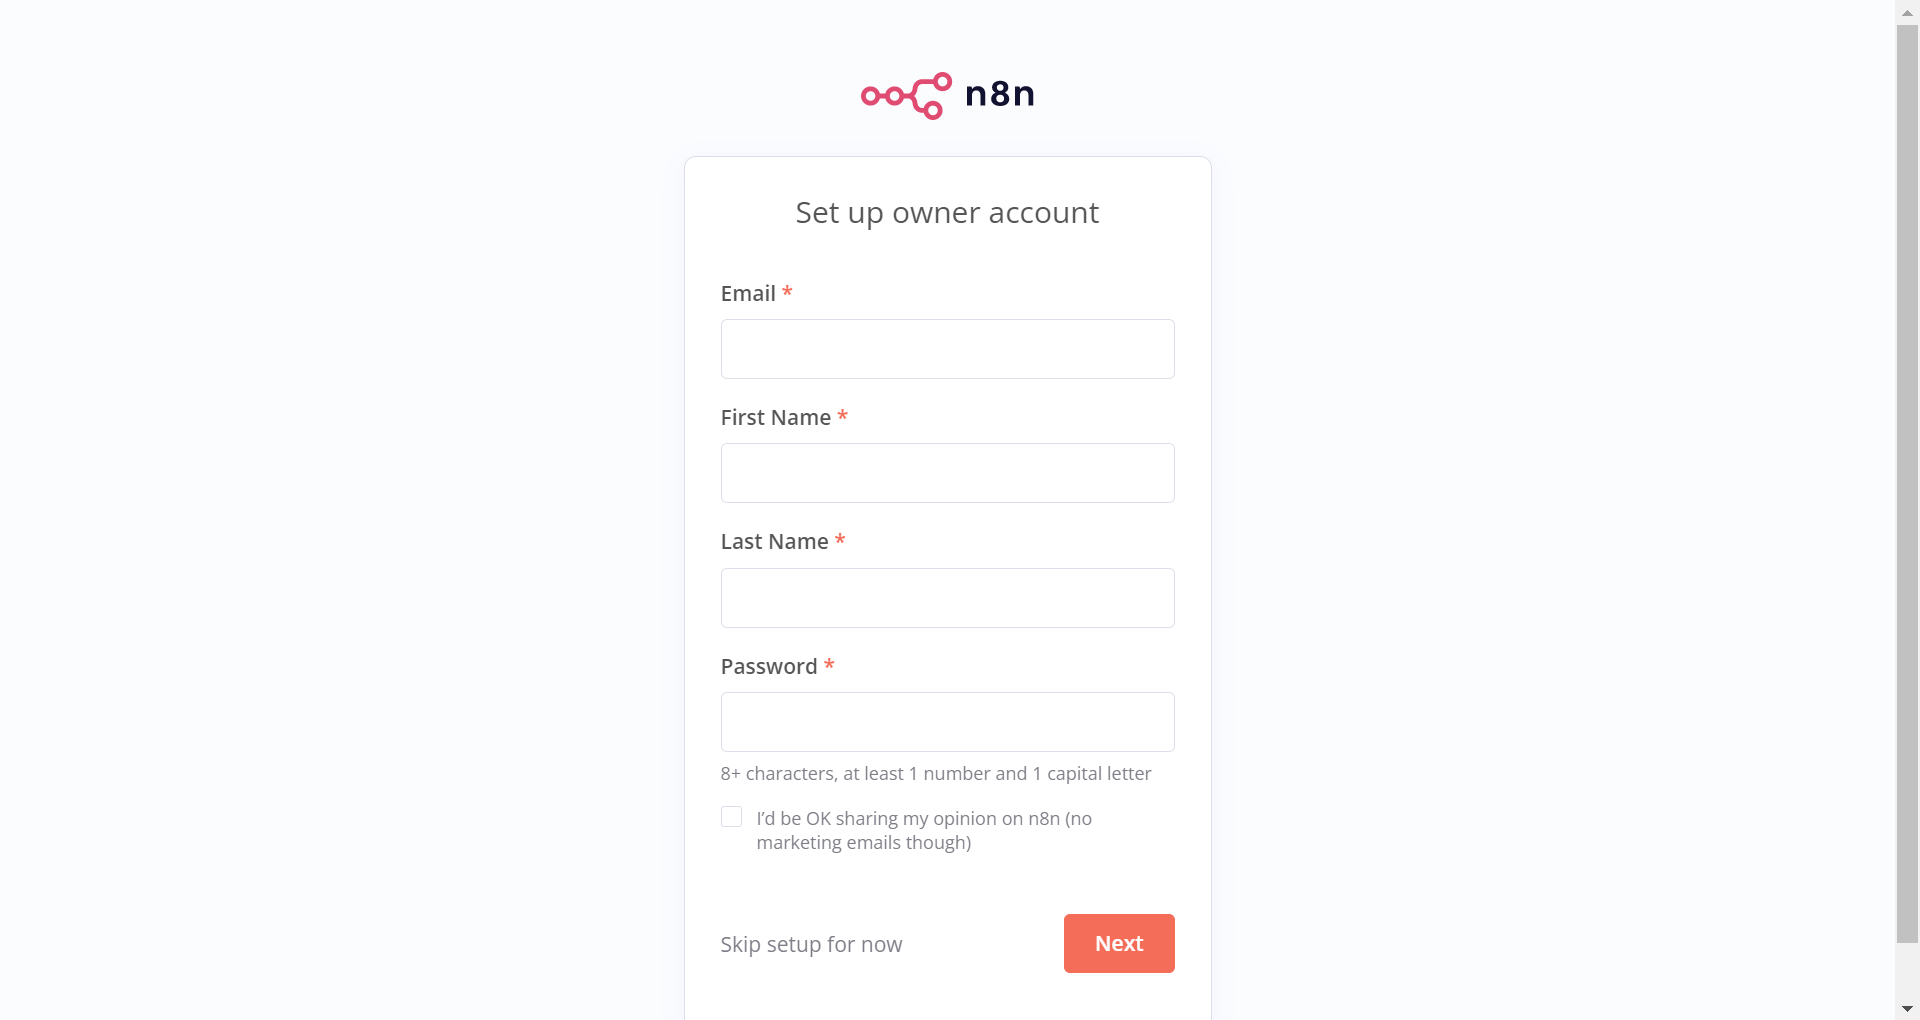
If everything goes well, you should see this screen!
I'll let you take it from here. If you want more guides, how-to's, and walkthroughs (including how to set up automations in n8n), don't forget to subscribe!